

Aardvark Clay 12-18-04
In 1997, I set out to build a gas fired kiln that would yield ceramic surfaces similar to those achieved in Japanese wood-fired kilns or Anagamas. The challenge was finding a way to deliver wood ash to the ceramic surfaces in the kiln. The following is the fruit of this search.
Preparing the Kiln for Loading
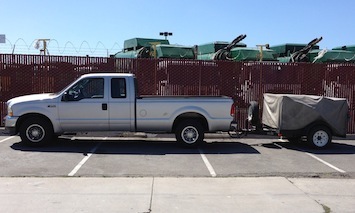
I arrive early in the morning, place the kiln into position, unhook the trailer hitch, and pull clear of the kiln.


Wheels of the trailer are chocked with angle iron. The masts and hoist assembly are removed from their tie downs.
I drop in the vertical hoist masts (square metal tubes) into two larger vertical tubes at the mid-section of the sides of the kiln, and place the horizontal hoist assembly onto the two vertical masts. I then take the winch cable and feed it through the hoist hardware and attach the cable end to the center of the lid. I loosen the the hold down bolts at the corners of the lid and then raise the lid by cranking the hand winch.
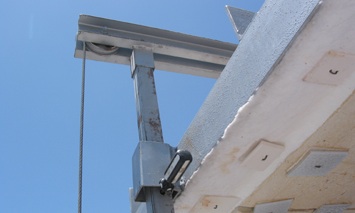
Once the lid is at it’s proper height, I place a safety pin or screw driver into a hole in each mast just under the frame of the lid. The lid is lowered down onto the pins where stress is removed from the hoist cable and the lid can not be lowered or dropped. This secures the lid for loading and unloading.

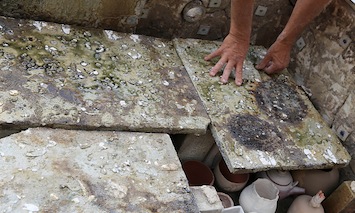
I proceed with the removal of brake lights, equipment, kiln shelves, and the burner from the interior of the kiln. I then remove old wadding from the floor with a brick hammer, sweep the floor, and vacuum.


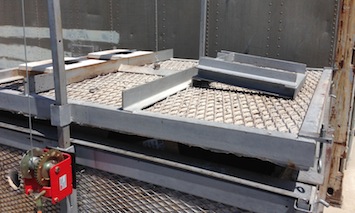
I then lay out the floor bricks that will support the top row of shelves. The bricks directly in front of the burner ports are placed there to act as shelf supports but also function to break up the ash and flame as it enters the kiln. They are laid down until it it is time to place the shelves.
Preparing Wadding Mixture
Mix equal weights of 1# Alumina Hydrate, 2# Lincoln 60 and 2# Grog 10×18.

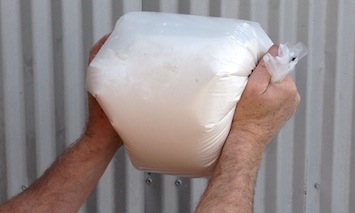
Dry materials are poured into an empty clay bag and mixed thoroughly by twisting the top of the bag until a balloon shape is created. Then it is shaken to blend the materials. 650 ml. of water is then added and the same mixing procedure followed.


Once the water has been absorbed by the dry mix, the wadding is wedged while it is still in the clay bag. When it is relatively well mixed, it is taken out and wedged. Wadding is used as a separation agent to keep pots from sticking to the floor and other objects.
Loading the Kazegama
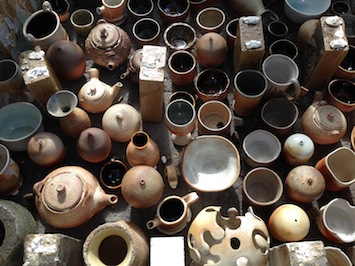
Clay bodies, glazes, flashing slips, and wadding used in wood firing work equally well in the Kazegama. Wares are loaded in the same manner as in a wood firing. Flashing slips can be found at: https://kazegama.wordpress.com/workshops/


Wares are temporarily placed on the floor without wadding to achieve the best arrangement possible. Tall pieces are placed along the back wall and side walls. Short pieces are placed down the middle and up front. This arrangement allows for better distribution of ash and heat over the entire floor area. The ash and heat exits through a 2 inch gap between the rear shelves and the back wall, up and over the rear pots, and then exit through the roof flues.

The shelves act to contain the ash in close proximity to the surface of the wares.
The top, rear section of the kiln is where plates and unusual forms are placed.The ash build up can be quite heavy, so wadding placement and sizing is important. Wadding should be placed inside of foot rings and up to a half-inch thick to keep the bottom of wares well above the shelves.
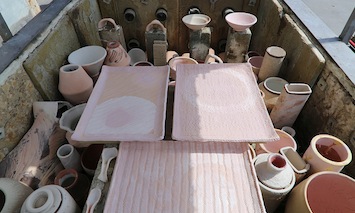

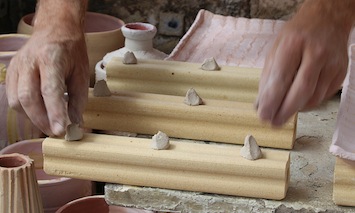
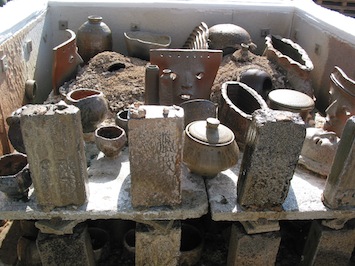
Pieces loaded closest to the burners will get the biggest hit of ash and heat. Pieces in the back are likely to exhibit subtle flashing if their exposure to ash and heat is limited. A cone 9 pyrometric cone is placed at the front edge of the load. When this cone starts to bend, screened wood ash is introduced into the kiln via the blower burners. The standard brick shapes (target bricks) shown in the picture will help break up and disperse wood ash and flame throughout the kiln. These target bricks are placed directly in front of each burner.
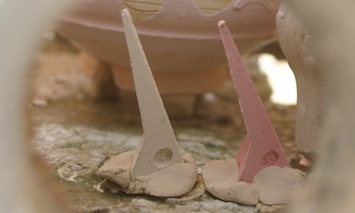

Self support cones(9-10) are supported with wadding to make sure they do not fall over during the firing. These are placed near the rear of the kiln on the top shelf. When they drop, the firing is completed.
Screening Wood Ash
I use wood ash that is given to me by the patriarch of Aardvark Clay. He lives in a geodesic dome in Carmel Valley and heats the dome with discarded crates and pallets from where I work at Aardvark Clay & Supplies. He then delivers the ash from these burned pallets when he visits Aardvark Clay.

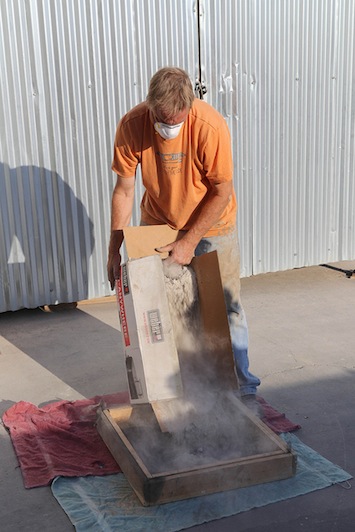
I start off by laying down two bath towels that will collect the screened ash. I constructed two wooden frames that support hardware screen. The bottom frame has a 1/2 inch hardware screen, and the top frame has a 1/4 inch hardware screen. In between the two screens is a plastic window screen. This window screen is supported by the bottom hardware screen. About 15 lbs. of ash will be deposited into the screens.

The top screen catches the bulk of the large chunks of charcoal as the two screens are shaken back and forth. I raise the top frame with my thumbs to allow the finer ash to drop through the screen. The top screen is then set aside, and the bottom screen is again shaken back and forth. What remains in the window screen is what I call Sintered Ash. The Sintered Ash is placed in a box and used for side fired pots.
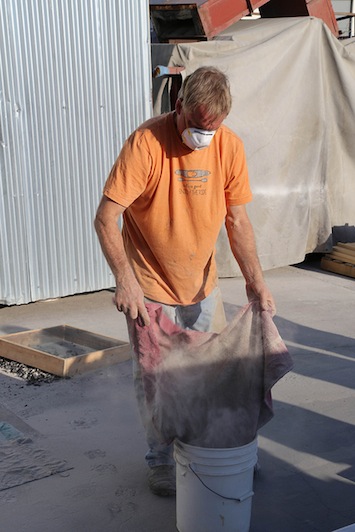

The ash that has collected on the bath towels is dumped into a bucket. I use about 2/3 of a bucket during the firing.
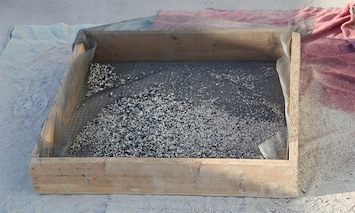
Sintered Ash
One interesting way to load pots is to place them on a bed of sintered ash instead of wadding. Sintered ash appears to be more refractory than most of the ash that is screened and is of a larger particle size. It dropped through the top hardware screen which is 1/4 inch, and remained on the window screen.

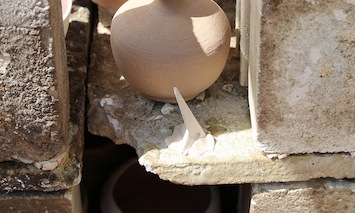
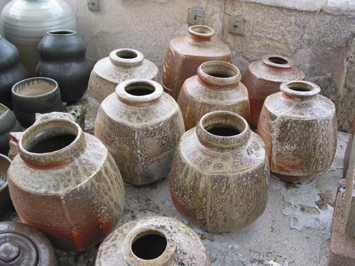
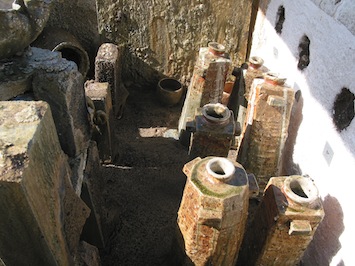
The vases on the floor of the firebox were placed on a bed of sintered ash. The ash is applied to the floor with a cup.


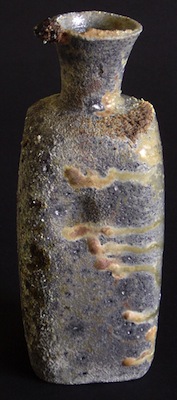
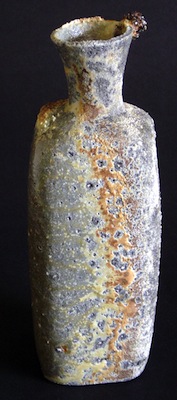

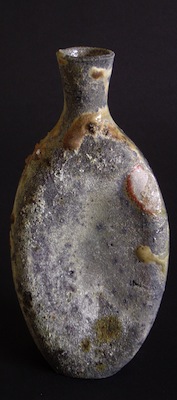
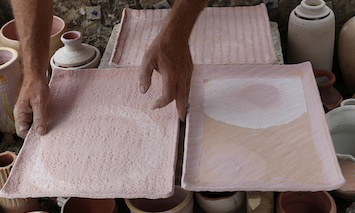
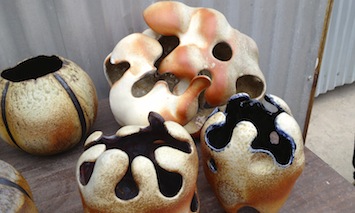
These pieces from workshop participants were placed onto sintered ash, creating melon surfaces. These were heavily reduced after the introduction of the wood ash when cone 9 dropped. Halos are the result of out-gasing of decomposed granite that was wedged into the clay. These surfaces resulted from six hour firings.
Preparing to fire the Kazegama
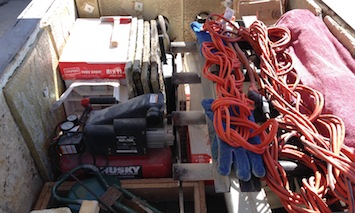
Safety first. I always keep the area around the kiln organized with only the necessities. The propane tanks are kept in an area where they are easy to reach and can be shut off in an emergency, and not likely to be knocked over. The propane tanks are kept 10 feet away from the kiln.

Sheet metal covers keep fiber blanket protected from loaders’s leaning on it while loading. It also reduces the inhalation exposure of fiber dust. There is a one inch fiber seal all around the top. The sheet metal guards are removed prior to firing.
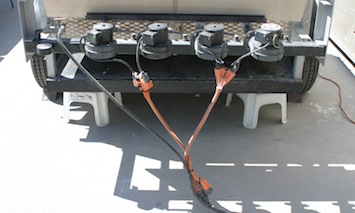

The electric power cord is wire-tied to the propane line so they are one unit for 4 feet from the burner manifold. This makes it less likely that I will get tangled up in them. The ground is swept clean in the burner area because a lot of ash will find itself on the ground, and I will sweep it up for re-use during the firing. The tools I keep handy during the firing are a crescent wench, leather gloves, welder’s goggles, long wand air gun to blow out the burner tubes of ash, an air compressor, 12 pounds of screened wood ash, a dust pan, a hand broom, water, and a face mask.
Firing the Kazegama
The objective of this firing is to create wood fired surfaces. This process takes over 6 hours and involves a candling period, firing to cone 9 in a neutral atmosphere, introducing screened wood ash, followed by heavy reduction for 30 minutes, and then firing in a low reduction atmosphere until cone 10 drops in the rear of the kiln.


I check the gas ball valves on the burner manifold to make sure everything is shut off. I then attach the propane line from the burner manifold to the propane tank and adjust the propane tank regulator to around 10 lbs. of pressure. The gas pressure at the burner manifold is around 1 lb. of water column pressure because of constriction from the propane hose.


I then open the trailer pilot gas cock with a wrench and simultaneously ignite the trailer pilot with a hand-held propane torch. Because four blower burners produce such a tremendous amount of heat, only one of the middle burners will be used during the first 20 minutes of the firing. I set the air shutter on the blower motor to the closed position. This still provides air through the blower. I then adjust the propane for the burner to the lowest possible setting in order to candle the kiln. The burner will remain at this setting for 20 minutes to drive off steam from the wadding. After 20 minutes, the other middle burner is ignited and the 2 burners will run like this for another 20 minutes. At this stage of the firing, physical water is driven off before steam forms at 212’F, which can cause wadding to blow up.
After 40 minutes of candling has passed, the main gas valve is turned off. As the residual gas is burned off from the 4 burners, all 4 burner valves are turned wide open. I then re-open the main gas valve (red) and adjust it to the desired gas pressure setting and adjust the 4 blower motor air flaps so they are all at the same setting and correspond with the gas pressure. All 4 burners are ignited by the trailer pilot .

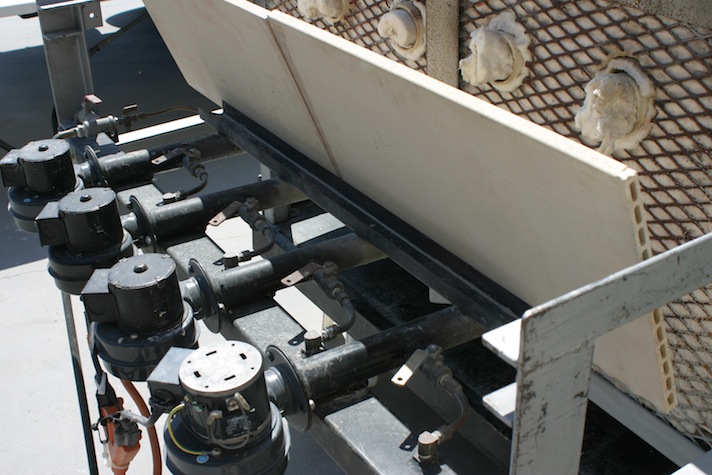
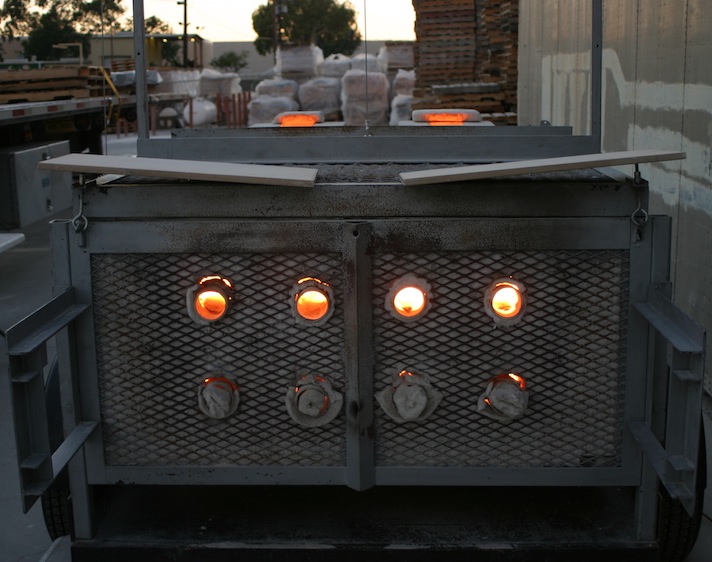
Kiln selves are used to shield the blower burners, power cords, and propane gas line from the tremendous amount of heat that is generated. This burner setup is the heart of the kiln.
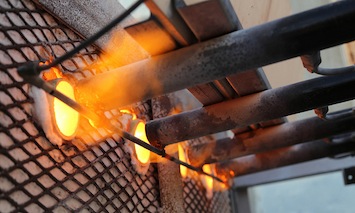
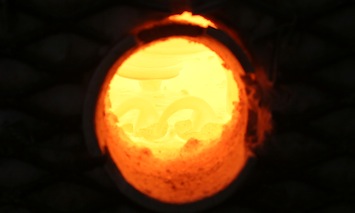
The best method to figure out the proper air/fuel ratio and settings is to fire at night when it is easy to read reduction flames coming from the flues. Another way is to read the color of specks in the inside surface of the burner ports. These nodules will glow bright orange when a burner is at the most efficient air/fuel ratio. You can also look for the build up of carbon soot on the underside of flue dampers when the atmosphere is reducing. Depending on the density of the load, cone nine can be achieved in 4 hours.
Introducing screened wood ash into the kiln
When a cone 9 witness cone placed on the front edge of the front shelf starts to bend, it is time to introduce screened wood ash. Hardwood ashes work best and should be screened to remove large chunks of charcoal, etc. that could damage the blowers. I place a bucket of twelve pounds of screened wood ash between myself, and the blower burners. The air flap for each blower is opened wide before the introduction of ash.

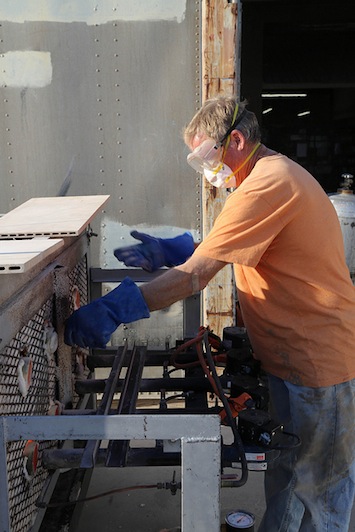
I start with the left burner and place a loose handful of wood ash up, underneath the air opening of the blower. The blower takes the ash as my hand moves in a circular motion. I feed 12 handfuls of ash into the blower intake. The burner blows the ash into the kiln, which hits a target brick eighteen inches into the kiln. After 12 handfuls of ash have been fed into the first burner, I move on to the other burners.
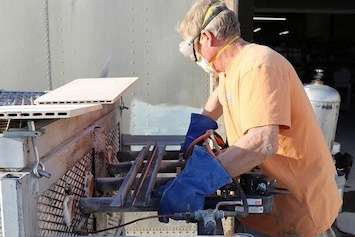

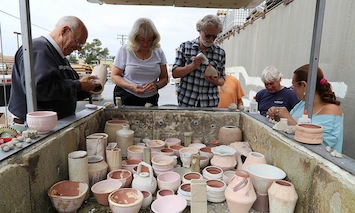
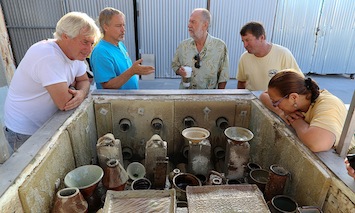
Once the lower level of burner ports have received their ash, I turn off the gas,I pull the plugs in the upper ports, the air on, I then move the burners up to a second level, place the port plugs into the lower ports, and start dispersing ash into the upper part of the kiln following the same process as used for the bottom burner ports. Jamie Boran, Kaz , and Mark Hedrickson watching James Meade feeding ash into the upper deck.


Here Jamie is blowing out the burner tubes with a long wand air gun to eliminate wood ash that collects in the burner tubes. This must be done after the completion of the blowing of ash through each burner.

The ash vacating the kiln is all that is visible from this process. There are no plumes of smoke as there are with wood fired kilns.
The kiln continues to climb in temperature during the introduction of the ash and can reach cone 10 or higher. Therefore, the feeding of ash must start at cone 9. Heat soaking takes about an hour and a half. I observe the melt of the ash with welder’s goggles. Un-melted ash will appear as dark blotches on the wares.

When cone ten has been achieved in the back of the kiln, I turn off the gas and remove the burner assembly. The plugs in the burner ports are left in the lower ports and are left out in the upper ports. The two flues in the lid are left wide open. I unload the kiln the following morning. The entire firing takes 6 – 8 hours and can reach temperatures of cone twelve in the front of the kiln.
Results from Several Firings

These 2 firings had mesquite charcoal added prior or during the firing to simulate a charcoal bed in a wood kiln.


Propane Facts
Propane is a hydrocarbon (C3H8) and is sometimes referred to as liquefied petroleum gas, LP-gas or LPG. Propane is produced from both natural gas processing and crude oil refining and exists as a liquid and a gas. At atmospheric pressure and temperatures above –44 F, it is a non-toxic, colorless, and odorless gas. Propane combust at 940F and produces a gas above -44F. A commercial odorant is added so propane can be detected if it leaks from its container.
Changing Out Propane Tanks
Right about the time that cone 9 starts bending and about 4 hours into the firing, I run out of propane pressure. It is time to change over to another tank. These tanks are 100# tanks. They hold 23 gallons of liquid propane. The inside of the tank contains liquid in the lower section, and gas in the upper section. Gas is formed above -44F, so as the ratio of cold gas increases through use, the propane and tank become very cold, and the pressure will drop to a point where there is not enough gas pressure to fire the kiln. Atmospheric moisture will start to freeze on the side of the tank as is gets colder and colder, a clue that the tanks will have to be changed out in short order. My solution is to place the tank into a bucket of water, raising the temperature and pressure of the tank. This allows for another 45 minutes of propane supply. It takes about 32 gallons of propane to fire this 35 cubic foot kiln.


Process and Aesthetics
The firing process of a wood fired kiln or a kazegama is an integral part of the aesthetic and visual vocabulary of ceramic work by complimenting the form, gesture, and surface qualities through the natural coloring and layering of wood ash. From very subtle blushes to heavy ash flows, wares from the Kazegama are remarkably similar to those fired achieved in wood firings.
Tradition
The kilns we fire and the types of wares we produce spring from a long history dating back many centuries. Each of us stands on the shoulders of those who have come before us. Kiln designs have changed with the introduction of new technologies, refractories, fuels, safety demands, and regulations. With all of these changes, the overriding emphasis for me is aesthetics. The Kazegama is just a tool that brings its own visual vocabulary to the ongoing tradition of the wood-fired aesthetic.

 copy")


")
")


