
Soda is very destructive to any kiln. All refractories including dense firebrick shapes will erode over a short period of time. In order to reduce this erosion, I have put a lot of effort into creating and testing high alumina coatings. Sodium molecules went right through these coatings and eroded the refractories under the coatings.

One day I was given some dense firebrick shapes that are used in a commercial glass furnace that are almost pure alumina. I used these high alumina bricks in a soda firing and they were severely eroded after just one firing where the brick came into direct contact with the soda. At that point, I gave up on developing a coating. In order to protect the refractories, I am now using kiln shelves that are mounted to the hot face of the kiln walls and lid. These last a very long time and can be replaced. This system shields the refractories from the soda for the most part.
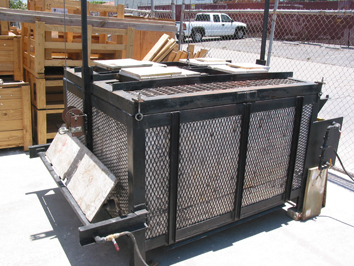
My kilns are generally constructed with angle iron and expanded metal. The frame of the kiln is 3 inch angle iron with expanded metal sides (#9-3/4 inch). The roof and floor are 1/4″ thick expanded metal which is so strong that I can walk on it. The walls and lid are comprised of 4 inches of fiber blanket. The walls and lid are covered with Corelite kiln shelves on the hot face surface. They are held in place with nichrome wire. I use 15 gauge nichrome wire in the walls, and 9 gauge nichrome wire for the Corelite shelves that are hung to the hot face of the lid. The floor is covered with dense fire bricks, a separation layer of 1″ fiber blanket, a 1″ layer of used shelves that are cut to fit within the walls, and a top layer of 1″ shelves. I use a moist mixture of half – 12 mesh sand and half – fireclay to fill in any gaps in all of these layers. Fiber blanket construction greatly reduces the kiln mass that has to be heated in order to reach cone 10. As it is, this kiln requires around 30 gallons of liquid propane at a cost of $100.00 per cone 10 firing.


Where the safety grate has been cut to form the flue openings, a fiber gasket is placed. Then the fiber blanket is laid down in “wall paper” fashion. 4 inches of fiber blanket are placed into the 3 inch angle iron frame.


Cone 10 porcelain buttons and 15 gauge nichrome wire hold the fiber against the safety grate and flue frame. Under proper tension, the fiber gasket will puff up where it will form a good seal with the flue bricks. With a good seal, little heat will creep over to the angle iron frame.


The pic on the left shows two layers of 2 ” fiber blanket, a 1″ fiber gasket, and the soft bricks that form the flue. To the right are the working flues.


The pic on the left shows Corelite kiln shelves suspended with 9 gauge nichrome wire. The fiber can rain down on pots during the firing, so it needs to be covered with the shelves. Always wear a face mask and goggles when generating fiber dust. If it is not possible to hang light weight shelves from the ceiling, you can also load shelves above your wares to shield them from the fibers.
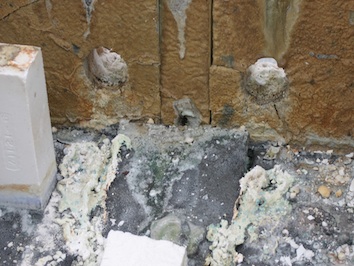
The pic on the right shows the destruction of the floor after just a few soda firings. Silicon carbide shelves are not a good choice. It is better to use a dense mullite or cordierite type of shelf.


This kiln was originally built as a burnout kiln for fiber board liners for Kazegama kiln construction. I converted it into a soda kiln, but it was not well suited due to the soft brick floor. Over time, the soda melted down through the floor shelves and into the soft bricks. The floor was torn out and replaced with 1 layer of hard bricks, a layer of fiber blanket, and 2 layers of used kiln shelves.

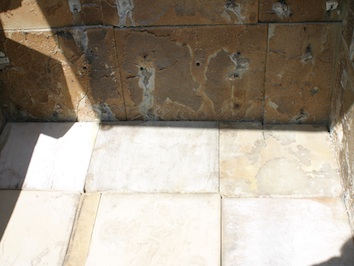
The hard brick will last for years and the fiber blanket and layers of used kiln shelves are for the purpose of creating sacrificial layers that take the brunt of the soda and will also make for easier removal of these refractories for repairs.

The gaps between the shelves and walls are filled with a sand and fireclay mixture.
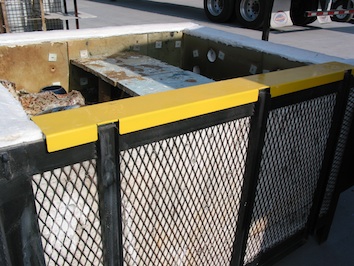
A sheet metal cover (shown in yellow) or a bath towel can be used to keep the lid fiber seal from degrading and spreading fiber dust into the air and participants clothing and lungs.


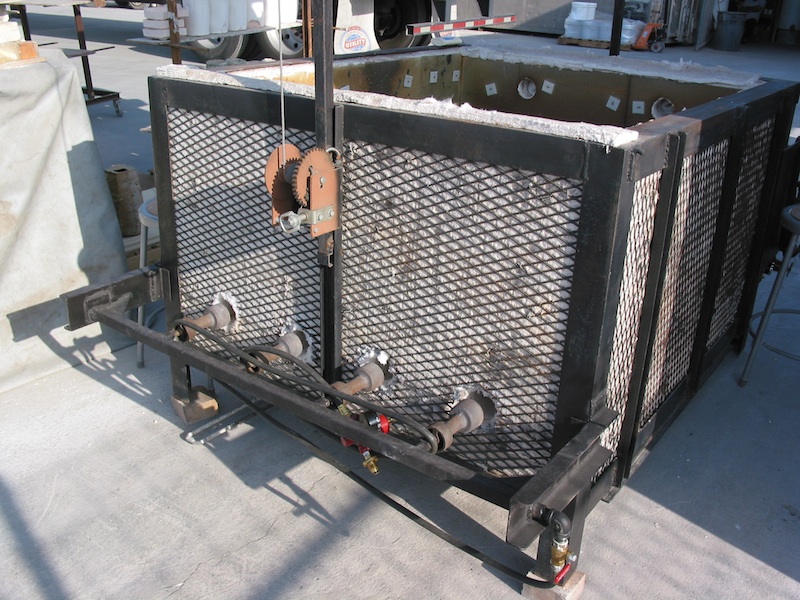
A simple hoist system of square tubing and channel. A screw driver or metal rod inserted through a hole in the square tubing mast will act as a safety if the lid were to drop.
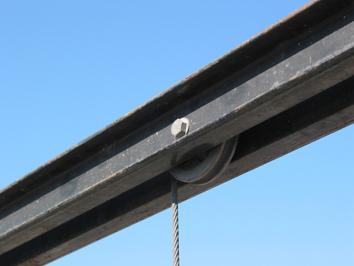

Here are the middle and outside lid pullies (3 inch). They are bolted into two pieces of 2″ channel and are seperated by welded 1.5″ square tubing that captures the top of each 1.25″ mast tube.

A S-hook and cable run from the middle of the lid and travel up through the two pulley wheels and down to the winch. An 8 inch eye hook has had part of the hook removed so that it can slip over the gear screw of a 1/2 ton worm gear winch. A drill motor lifts the lid quickly up the 2 lid masts. The lid’s square tubing that surrounds the vertical mast should be much larger than the vertical mast, or the lid will bind as the it moves up and down.


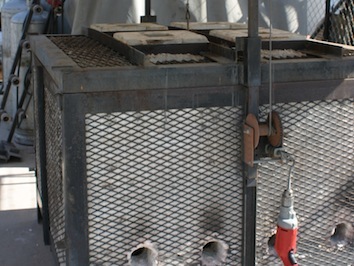
The lid is held in place with eye hooks and nuts.
Any propane appliance has to be regulated. This 30 pound regulator is a step up from a BBQ regulator. A pounds pressure gauge that is rated to 15 pounds is very helpful in firing a kiln.

 copy")


")
")


Do you sell this kiln? Or offer plans to build one?
Chad, I don’t have plans. I just put these things out there for others to work with.
AND IT IS VERY MUCH APPRECIATED. EXCELLENT WORK
This is just what I was looking for. Thank you for sharing. Do you have burners on 2 sides? And do you put blocks in front of them inside the kiln to diffuse and guide the heat around?
and thanks for the mixed ash you gave me several years ago at Aardvark.
Xananda
Xananda, There burners on both sides and flames continue unimpeded across the floor under the wares. When the soda is dumped onto the floor, the flame runs right over it, volatizes and travels upwards through the wares.