
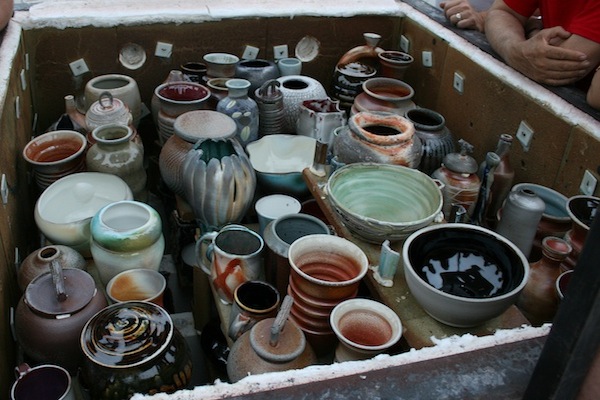
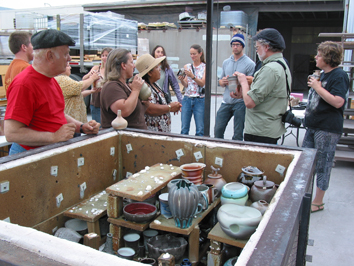
Kiln Opening of Student Work
Soda firing involves the introduction of sodium sources such as soda ash (carbonate), soda bicarbonate, and borax into the kiln environment starting at cone 8. The soda combines with the silica, alumina, iron, and other elements in the surface of the wares to produce a glazed or flashed surface.
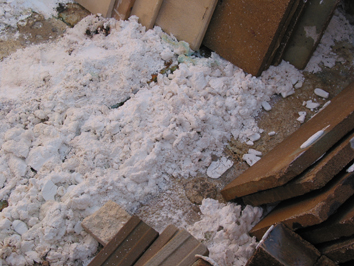
After each firing, a mixture of mostly calcium oxide and salts remains. Over a period of two weeks, the leftover mixture takes on moisture from the atmosphere and changes into a fluffy pile of white powder.

Prior to loading the kiln, the calcium oxide and other debris is vacuumed from the floor.
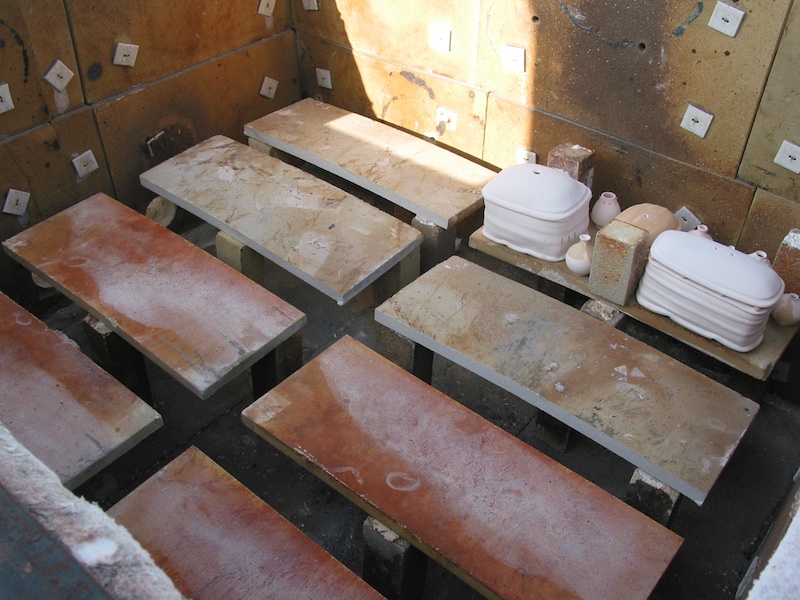
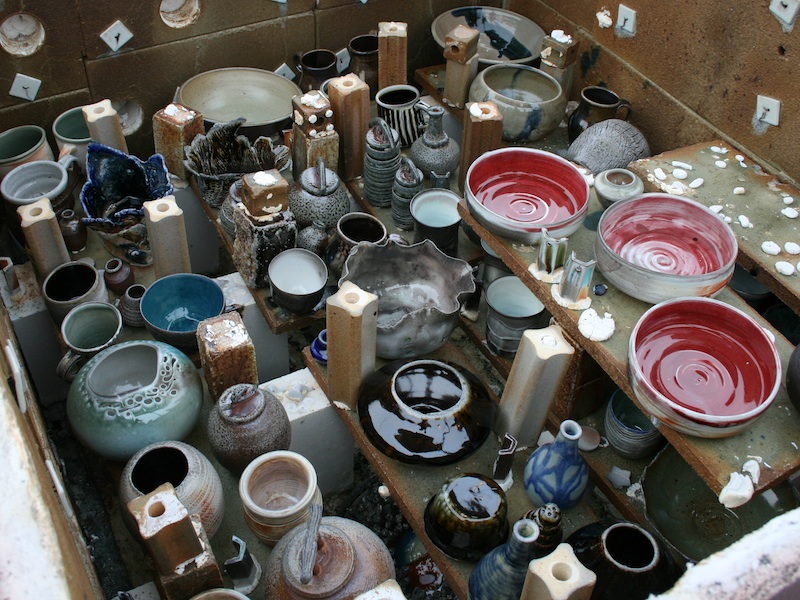
The first layer of shelves are placed 9 inches above the floor. The floor area is where soda will be introduced at cone 8 so this area is very open to allow flame and soda an area to “breathe” and be distributed evenly throughout the kiln. The spaces between the shelves and pots will have an impact on the distribution of heat and soda.

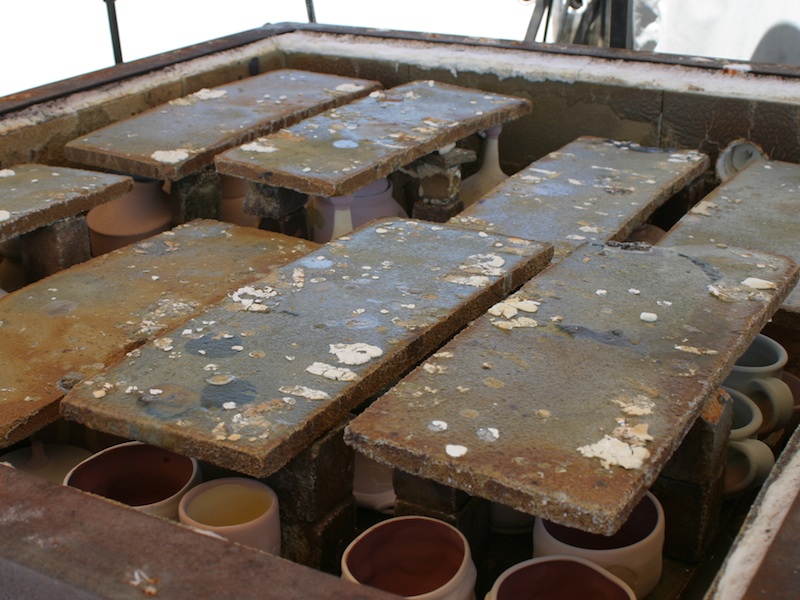
The feet of vessels are kept within the surface area of the shelves. If they over hang, they will aquire too much soda and suffer glaze runs.
If debris is falling on the tops of pieces, shelves can be placed to shield them. This also forces soda to be circulated between the underside of the shelves and the pieces, where better contact with soda is achieved.
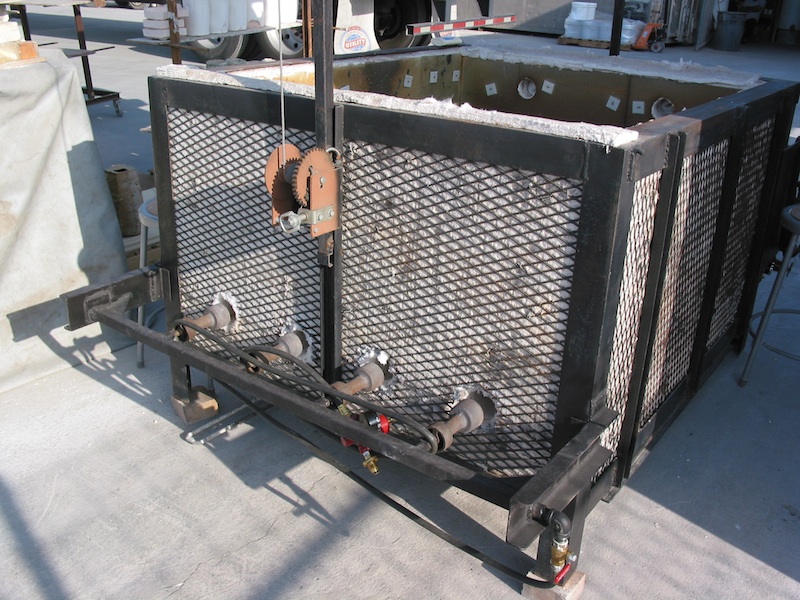

During the first firing, I set the damper and red handled gas valve to wide open at 2,000’F, and adjust the propane regulator for the proper air fuel ratio. I then mark the site glass on the pressure gauge with a marker. Then, in future firings, I will have a relatively efficient atmosphere. The atmosphere should be neutral for most of the firing until around cone 8. At this time the soda mix is introduced. The atmosphere of the kiln is going to become more reduced as the temperature goes up. This is caused by the increased expansion of gases as the kiln rises in temperature. Since the propane is coming into the kiln under more pressure than the natural draft of air, the atmosphere will become more and more fuel rich. As a result of these atmospheric changes, damper adjustments must be made during the firing. An easy way to check the atmosphere of the kiln if the reduction flame is hard to see in the light of day, is to take a peek at the underside of a damper. If it is covered in soot, then you are fuel rich. All propane systems must use a regulator. A regulator that is a step up from a bar-b-que regulator and goes from 0-15 psi is a good choice. The actual pressure at the burner manifold is in inches of water column, even though the pressure is shown as psi at the regulator pressure gauge. This pressure drop is caused by the resistance in the narrow propane hose. I should install a pressure gauge at the burner manifold between the burners and the gas valve.
There is no flame safety for this kiln, so wind shields are used in the early stages of the firing and a watchfull eye is kept.
The Gail Nichols Method of Soda Introduction
Gail Nichols uses a mixture of calcium carbonate, soda carbonate, and soda bicarbonate. I use a variation of 10 pounds of calcium carbonate (whiting), 5 pounds of soda carbonate(soda ash), and 5 pounds of soda bicarbonate. These dry materials are well mixed in the dry state and poured into a bucket of 5500 cc of water where they are mixed with a mixing prop and drill motor. This mixture becomes very hot and can burn your skin and hands, so wear goggles and gloves when mixing. In Gail’s excellent book, “Soda, Clay, and Fire”, it is recommended that the soda ash be “light ” soda ash, not “dense” soda ash. Either type works just fine, but the chemistry of the light soda ash allows for the mixture to set up like plaster, and is broken up into chunks for easy handling and introduction into the kiln. Mixing calcium carbonate with soda carb and soda bicarb has no glaze forming effects but reduces the fusing of the two sodas on the kiln floor which allows for improved volatilization. The benefit of this technique is that after the soda has been introduced, it takes an hour and a half of heat soaking to volatilize all of the soda mix, and vapor clouds normally associated with soda firings are greatly reduced.

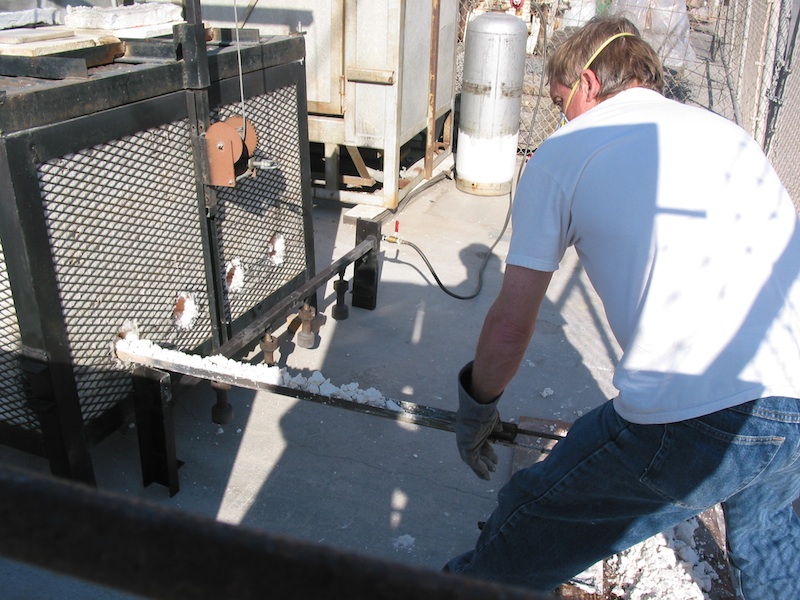
At cone 8, the soda mixture is mixed and poured onto a plywood board just as it is starting to set up. Mark Coppos is chopping up the soda mix and Steve Davis is introducing the soda mixture. The burner manifold has been removed to gain access to the burner ports. The soda mix is introduced via a piece of steel channel that reaches to the far wall of the kiln. The soda mixture is evenly distributed into the 4 burner ports on just one side of the kiln. The channel is rotated and shaken to release the soda onto the floor. The floor area must be free of obstructions in order to do this. Care must be taken to avoid the firebricks that support the shelves.
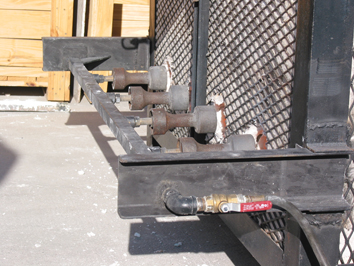

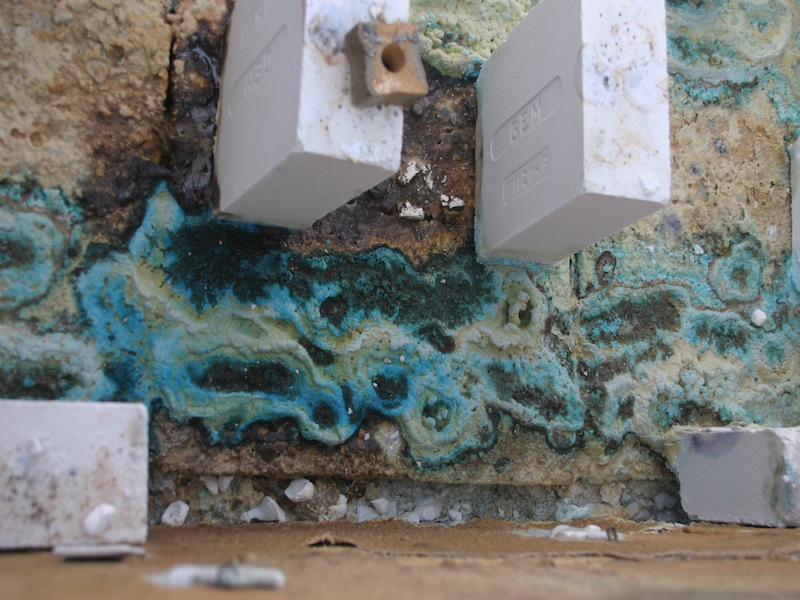
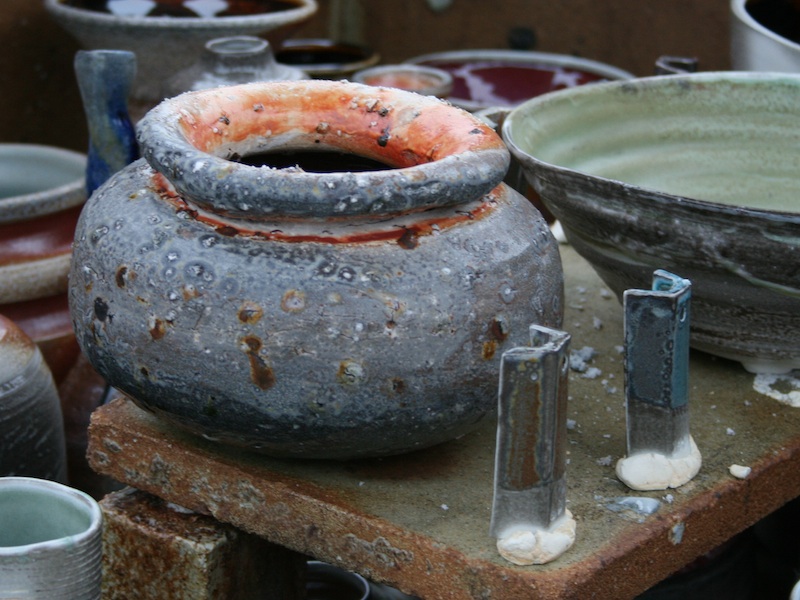
The manifold is then put back into place. A heavy reduction for twenty minutes after the last introduction of soda, creates a variety of surfaces. These surfaces range from bleached out sections of heavily glazed surfaces, carbon trapping, to very dry, flashy, and sugary areas from high alumina clay bodies and slips. These surfaces all depend on the amount of soda that is in contact with the surfaces of the wares, the atmosphere of the kiln at certain stages of the firing, and the types of slips and clay bodies that are used. I turn the gas down a bit to hold the temperature steady around cone ten, and heat soak the wares for about an hour and a half. This gives the soda mix additional time to “paint” the wares. At the conclusion of the firing, I leave the dampers half open to crash cool the kiln. The kiln is opened first thing the following morning.


Oribe inspired dishes by Steve Davis
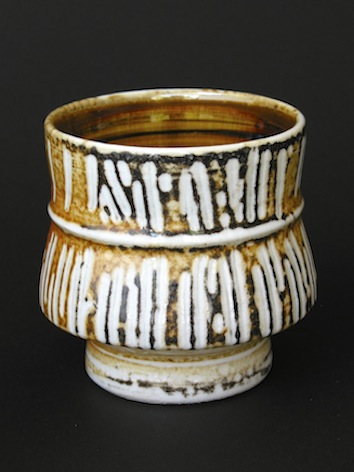
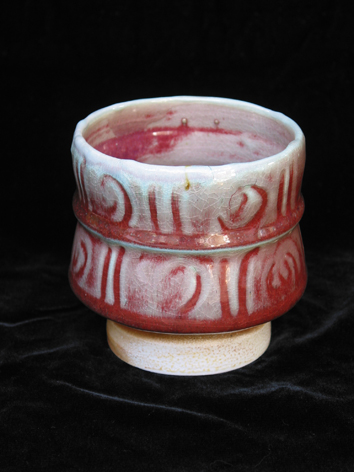

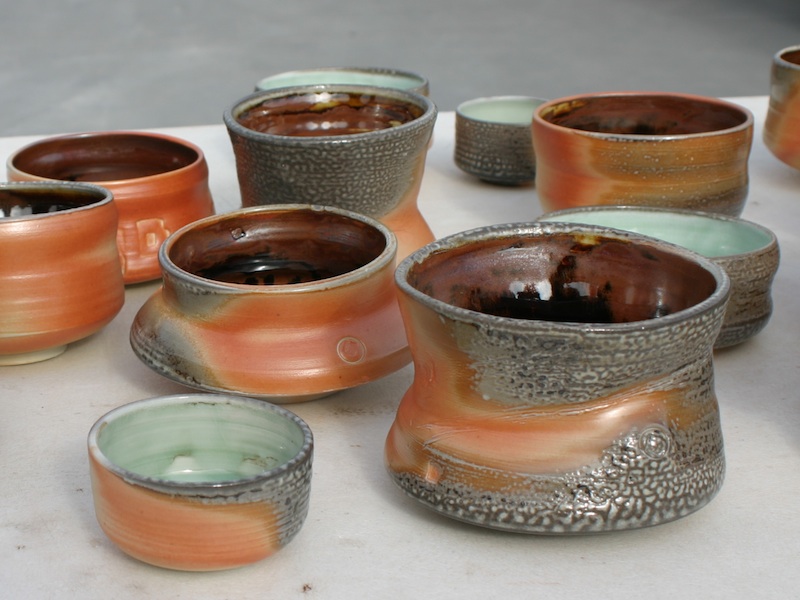
Soda Fired Cups by Steve Davis

 copy")


")
")


